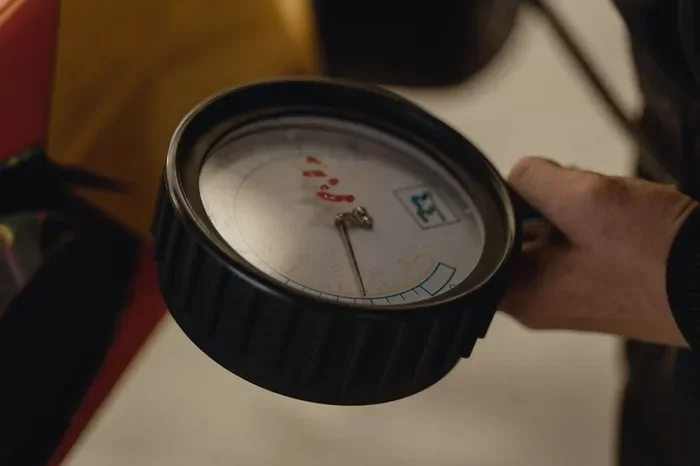
AC Pressure Chart Guide To Diagnose Cooling Problems
An AC pressure chart is one of the most powerful tools for diagnosing cooling problems in your HVAC system. It shows you exactly what refrigerant pressure should look like at different temperatures, helping you spot issues fast. Whether your AC blows warm air or freezes up, reading the pressure chart can point you right to the cause. This guide walks you through everything you need to know, from basic readings to real-world troubleshooting tips.
Your air conditioner is acting up again. It blows warm air, or maybe it freezes up for no clear reason. You check the thermostat. You change the filter. But the problem stays. What if there was a simple tool that could tell you exactly what is going on inside your cooling system?
That tool is the AC pressure chart. It is one of the most useful resources any homeowner or technician can have. An AC pressure chart maps out what your refrigerant pressure should be at different temperatures. When your readings do not match the chart, you know something is off. This guide will show you how to read an AC pressure chart step by step. You will learn what the numbers mean, what common problems look like, and how to fix them.
Whether you are a DIYer or just curious about how your HVAC system works, this article has you covered. Let us dive in and make sense of those pressure readings.
Key Takeaways
- AC pressure chart basics: Understand what low-side and high-side pressures mean for your cooling system.
- Diagnose common problems: Use pressure readings to detect refrigerant leaks, clogged filters, and compressor failures.
- Learn the right tools: A quality manifold gauge set and AC pressure gauge make readings accurate and easy.
- Follow temperature corrections: Ambient temperature changes affect your pressure readings significantly.
- Avoid costly mistakes: Overcharging or undercharging refrigerant can damage your entire HVAC system.
- Safety first: Always follow proper handling procedures when working with refrigerant and pressure equipment.
📑 Table of Contents
- What Is an AC Pressure Chart?
- How to Read an AC Pressure Chart
- Common AC Pressure Chart Problems and What They Mean
- AC Pressure Chart by Refrigerant Type
- Using Temperature to Correct Your Pressure Readings
- Quick Tips for Accurate AC Pressure Chart Readings
- Common Mistakes to Avoid When Using an AC Pressure Chart
- When to Call a Professional
- Conclusion
What Is an AC Pressure Chart?
An AC pressure chart is a reference table or graph. It shows the expected pressure of refrigerant inside an air conditioning system at various temperatures. Every type of refrigerant has its own chart. The most common ones are R-410A and R-22. Each refrigerant behaves differently under pressure, so you must use the right chart for your system.
The chart typically has two columns or sides. The low-side pressure and the high-side pressure. Low-side pressure refers to the suction line coming from the evaporator coil. High-side pressure refers to the discharge line leaving the compressor. By comparing your actual readings to the chart values, you can pinpoint problems quickly.
Why Pressure Matters in Cooling Systems
Your HVAC system relies on a closed loop of refrigerant. This refrigerant absorbs heat inside your home and releases it outside. The pressure of the refrigerant determines how well it can absorb and release that heat. If the pressure is too low or too high, your system will not cool properly.
Here is why pressure readings matter:
- Low pressure can mean a refrigerant leak or a clogged expansion valve.
- High pressure can signal a blocked condenser, overcharged system, or failing compressor.
- Unstable pressure may point to moisture in the system or a faulty thermal expansion valve.
Using an AC pressure chart helps you turn vague symptoms into clear answers. Instead of guessing, you let the numbers guide you.
How to Read an AC Pressure Chart
Reading an AC pressure chart is easier than it looks. You just need the right tools and a basic understanding of what the numbers mean. Let us walk through the process.
Step 1: Gather Your Tools
You will need a few things before you start:
- Manifold gauge set — This connects to your AC service ports.
- AC pressure gauge — Most manifold sets include both low and high gauges.
- Thermometer — To measure ambient or return air temperature.
- The correct AC pressure chart — Match it to your refrigerant type.
Make sure your gauges are calibrated correctly. A cheap or damaged gauge set can give you wrong readings. That leads to wrong diagnoses and wasted time.
Step 2: Take Your Pressure Readings
Turn on your AC system and let it run for at least 10 to 15 minutes. Connect your manifold gauge set to the service ports. The low-side port is usually on the larger line near the evaporator. The high-side port is on the smaller line near the compressor.
Write down both readings. The low-side gauge shows suction pressure. The high-side gauge shows discharge pressure. These are your starting numbers.
Step 3: Check the Chart
Now find your AC pressure chart for your specific refrigerant. Look up the temperature of the air entering the evaporator or the ambient temperature outside. The chart will show you the expected pressure for that temperature.
Compare your actual readings to the chart values. If they match closely, your system is likely working fine. If they are off, you have a clue about what is wrong.
Common AC Pressure Chart Problems and What They Mean
This is where the AC pressure chart becomes your best friend. Different pressure patterns point to different problems. Let us look at the most common ones.
Low-Side Pressure Is Low and High-Side Pressure Is Low
If both sides show low pressure, you likely have a refrigerant leak. The system is low on charge. This is one of the most common cooling problems. Signs include warm air from vents and the AC running constantly without cooling the house well.
To fix this, you need to find the leak first. Common leak spots include:
- Service port fittings
- Evaporator coil connections
- Condenser coil fins
- Refrigerant line joints
After repairing the leak, you must recharge the system to the correct level. Never just add refrigerant without finding the leak first. That is wasteful and can harm the environment.
Low-Side Pressure Is Low and High-Side Pressure Is High
This pattern often points to a clogged expansion valve or a blocked orifice tube. The refrigerant cannot flow properly through the system. The low side starves for refrigerant while the high side builds up too much pressure.
Other possible causes include:
- A dirty condenser coil
- Debris blocking the refrigerant line
- A malfunctioning thermostatic expansion valve
This type of problem can stress your AC compressor over time. The compressor works harder, which can lead to premature failure. Fixing a clogged valve early saves you from a much bigger repair bill.
Low-Side Pressure Is High and High-Side Pressure Is Low
This is less common but still important. It can indicate a failing compressor. The compressor is not pumping refrigerant properly. The low side gets too much pressure while the high side cannot build enough.
Other signs of a bad compressor include:
- Strange noises from the outdoor unit
- Warm air even when the system runs
- Circuit breaker trips frequently
Compressor replacement is one of the most expensive AC repairs. If you suspect this issue, get a professional to confirm before replacing anything.
Both Pressures Are High
High pressure on both sides usually means the system is overcharged with refrigerant. Too much refrigerant floods the condenser and raises pressure on both sides.
It can also be caused by:
- Restricted airflow across the condenser
- A dirty outdoor coil
- High ambient temperatures
Always check your airflow first. Sometimes a simple cleaning of the condenser coil solves the problem. If the charge is truly too high, a professional should recover the excess refrigerant safely.
AC Pressure Chart by Refrigerant Type
Not all refrigerants are the same. Using the wrong chart or the wrong refrigerant can cause serious damage. Here is a quick look at the two most common types.
R-410A Refrigerant
R-410A is the most common refrigerant used in modern AC systems. It operates at higher pressures than older refrigerants. Your AC pressure chart for R-410A will show higher numbers than R-22 charts. Always make sure you are using the R-410A chart if that is what your system uses.
R-410A systems also require special equipment. The gauges, hoses, and recovery machines must be rated for R-410A pressures. Mixing R-22 and R-410A equipment can be dangerous.
R-22 Refrigerant
R-22 was the standard refrigerant for many years. It is now being phased out in most countries due to environmental concerns. If you have an older system using R-22, you must use the R-22 AC pressure chart. The pressure readings will be different from R-410A systems.
Because R-22 is being discontinued, many homeowners are switching to newer refrigerants or replacing their systems entirely. If you are dealing with an R-22 system, talk to an HVAC professional about your options.
Using Temperature to Correct Your Pressure Readings
Here is something many people miss. Pressure readings change with temperature. Your AC pressure chart gives you expected pressures at specific temperatures. If the ambient temperature is different from the chart baseline, your readings will shift.
For example, on a very hot day, your high-side pressure will naturally be higher than on a mild day. That does not always mean something is wrong. You need to compare your readings to the chart at the current temperature.
Two important measurements help here:
- Superheat — This measures how hot the refrigerant gas is after it leaves the evaporator coil. It tells you if the system has the right amount of refrigerant flowing to the evaporator.
- Subcooling — This measures how cool the liquid refrigerant is before it enters the expansion valve. It helps confirm the proper charge level.
Both superheat and subcooling give you a more accurate picture than pressure alone. Many technicians use them together with the AC pressure chart for the best results.
Quick Tips for Accurate AC Pressure Chart Readings
Getting accurate readings makes all the difference. Here are some tips to help you get it right every time:
- Wait for stable readings. Do not take measurements right after turning on the system. Let it run for at least 10 minutes.
- Check ambient temperature. Record the outdoor temperature and the return air temperature. These affect your pressure values.
- Use clean connections. Dirt or debris on service ports can cause inaccurate readings and even damage the gauge.
- Never open both valves at once. On your manifold gauge set, open the low and high valves separately to avoid shocking the system.
- Cross-reference with other symptoms. Pressure readings are just one piece of the puzzle. Combine them with airflow checks, temperature measurements, and visual inspections.
Common Mistakes to Avoid When Using an AC Pressure Chart
Even experienced people make mistakes with pressure readings. Here are some errors to watch out for:
- Using the wrong chart for your refrigerant. R-410A and R-22 charts are very different. Mixing them up leads to wrong conclusions.
- Ignoring ambient temperature. Pressure changes with temperature. Always adjust your expectations based on current conditions.
- Overcharging the system. Adding too much refrigerant is a common mistake. It can damage the compressor and reduce system efficiency.
- Neglecting to check for leaks first. If your system is low on refrigerant, find the leak before recharging. Otherwise, you will lose the new charge too.
- Relying only on pressure readings. Pressure is important, but it should not be your only diagnostic tool. Use it alongside other methods for the best accuracy.
When to Call a Professional
There is a lot you can do with an AC pressure chart on your own. But some situations need a trained HVAC technician. Call a professional if:
- You cannot find the source of a refrigerant leak.
- Your compressor shows signs of failure.
- You are uncomfortable working with refrigerant or pressurized systems.
- The pressure readings seem normal but the system still does not cool.
- You need to handle refrigerant removal or recharging legally and safely.
Handling refrigerant requires EPA certification in many areas. A licensed technician has the training and equipment to do the job safely and correctly. Do not hesitate to call for help when the job is beyond your comfort level.
Conclusion
The AC pressure chart is a simple yet powerful diagnostic tool. It gives you clear, actionable information about what is happening inside your cooling system. By learning how to read the chart and understand your pressure readings, you can diagnose many common cooling problems on your own. You save time, money, and the frustration of guessing.
Remember to always use the correct chart for your refrigerant type. Take your time with readings, and never rush the process. Combine pressure data with temperature measurements, airflow checks, and visual inspections for the most accurate diagnosis. Whether you are a homeowner troubleshooting a warm-air problem or a technician fine-tuning an HVAC system, the AC pressure chart is your go-to reference.
Start practicing with your system today. The more you work with pressure readings, the more confident you will become. Your cooling system will thank you with better performance and fewer breakdowns.
Frequently Asked Questions
What refrigerant pressures should I expect on a normal day?
Normal pressures depend on your refrigerant type and the outdoor temperature. On a typical 75°F day, R-410A systems usually show low-side pressure around 70 to 90 PSI and high-side pressure around 200 to 250 PSI. Always check your AC pressure chart for the exact expected values at your current temperature.
Can I use the same AC pressure chart for all air conditioning systems?
No, you cannot. Different refrigerants use different charts. R-410A and R-22 have very different pressure ranges. Always match your chart to the refrigerant type in your system. Using the wrong chart will give you incorrect readings and wrong diagnoses.
What tools do I need to read my AC pressure chart accurately?
You need a manifold gauge set that matches your refrigerant type, a thermometer to measure ambient and return air temperatures, and the correct AC pressure chart for your system. A clean set of connections and a well-calibrated gauge set will help ensure accurate readings every time.
Is it safe to handle refrigerant and pressure gauges myself?
For basic pressure readings and visual inspections, it is generally safe for homeowners. However, refrigerant handling, leak repair, and system recharging may require EPA certification in many areas. Always check local regulations and call a professional for tasks you are not comfortable performing.
What does it mean if my high-side pressure is always too high?
High high-side pressure can be caused by several things. A dirty condenser coil, blocked airflow, overcharged refrigerant, or a failing compressor are common culprits. Check your condenser coil first for dirt and debris. If the coil is clean, compare your readings to your AC pressure chart to narrow down the cause.
How often should I check my AC pressure readings?
You do not need to check pressure readings regularly. A seasonal check at the start of cooling season is usually enough for most homeowners. However, if you notice cooling problems, warm air from vents, or ice buildup on the lines, taking pressure readings right away can help you diagnose the issue quickly.